
Let’s face it. Downsizing is not a project that you can finish in a day. Yes, a dumpster will solve your easier decisions, but then it gets harder. Will the kids take some of this china in their homes? Can I sell some of these books? What do I do with all this sports equipment? If you’re not careful, you will see a series of unfinished sorting projects throughout your home. You might see piles spilling into other piles. Then you get discouraged because you produce more confusion, not less.
Bookmark your downsizing project
If you happen to be a client reading this and you think that am writing about you, relax. You are in good company. This describes many of our downsizing clients, not just you. So how do you take control of the downsizing process? I recommend starting with a plan for bookmarking it. Just as with downsizing, you know that you are not going to finish a book in one sitting. With a book, however, you have a simple plan. You place a bookmark where you have stopped. That way you don’t waste any time looking for where you left off, when you resume reading. A downsizing project requires a bookmark too, so that you don’t loose progress when you resume. In fact, you need several bookmarks, because downsizing is more complex than reading a book. These tips will show you how to safely bookmark your downsizing project.
1. Establish exit zones
One common point of confusion comes from forgetting intended destinations. I know these decisions are all perfectly clear as you make them, but that has a way of changing. Maybe you have created separate piles for each destination, but you forget which is which when you revisit them. Maybe you are working with someone else who can’t distinguish them and mixes them up. Always start downsizing by establishing clear exit zones. The garage is the best place to do this. There tends to be a lot of quick wins there that are easier to sort fast.
Once that is done, create a clear “donate zone” on one wall. If you’re using a hauling truck instead of a dumpster, establish a “discard zone” on the other side. You may want to create a “sell zone” in the basement. In each zone there should be a clear sign for each so that there are no excuses for misplacement. You may think these zones are bigger than necessary but they are for the rest of the house too. The garage is also a good place to hold items to give to others. This is for items you want to give to someone specifically, as opposed to a general donate. Over several days these exit zones will represent a clear bookmark on purge decisions.
2. Establish processing zones
Within your house there are other zones to consider. On each floor it makes sense to establish one processing area. Start by sorting through that area first, then move on to other rooms. It’s best to do one room at a time rather than a little in each all at once. Beside the exit zones you have established in the garage, plan for additional zones. If you were organizing your home, you would simply need a “keep zone.” However, it’s a different story when you are trying to sell your home. When you make the decision to keep an item, consider if it will help the sale of your home.
I’m talking about visible items, including items in your closets. You may want to consult with a professional stager about what items should be displayed. Otherwise, when it doubt, don’t leave it out. Buyers want to envision their home, no look at yours. So items like framed family photos and unique decor should not be visible. Keep these in an “items to move” zone. The attic is usually the best place to keep these because buyers typically don’t need to see the attic. (However, be aware that photos can be damaged in a hot environment for an extended period of time.) So as you select items to keep think in terms of keep-to-show or keep-to-move. This distinction will create a bookmark that secures the progress of your selling process.
3. Use processing tools
I touched on this in my post “Why Organizing Should Go FAST (And How To Do It).” There is a tendency to combine the process of getting organized with the process of staying organized. That is a mistake. Different approaches and different supplies apply to each process. To be clear, there really isn’t a staying organized process for downsizing, but there is an equivalent. That equivalent is the move. The move is when the distillation of your getting-organized decisions are moved to the desired location. As with organizing-to-stay, organizing-to-move requires two sets of tools.
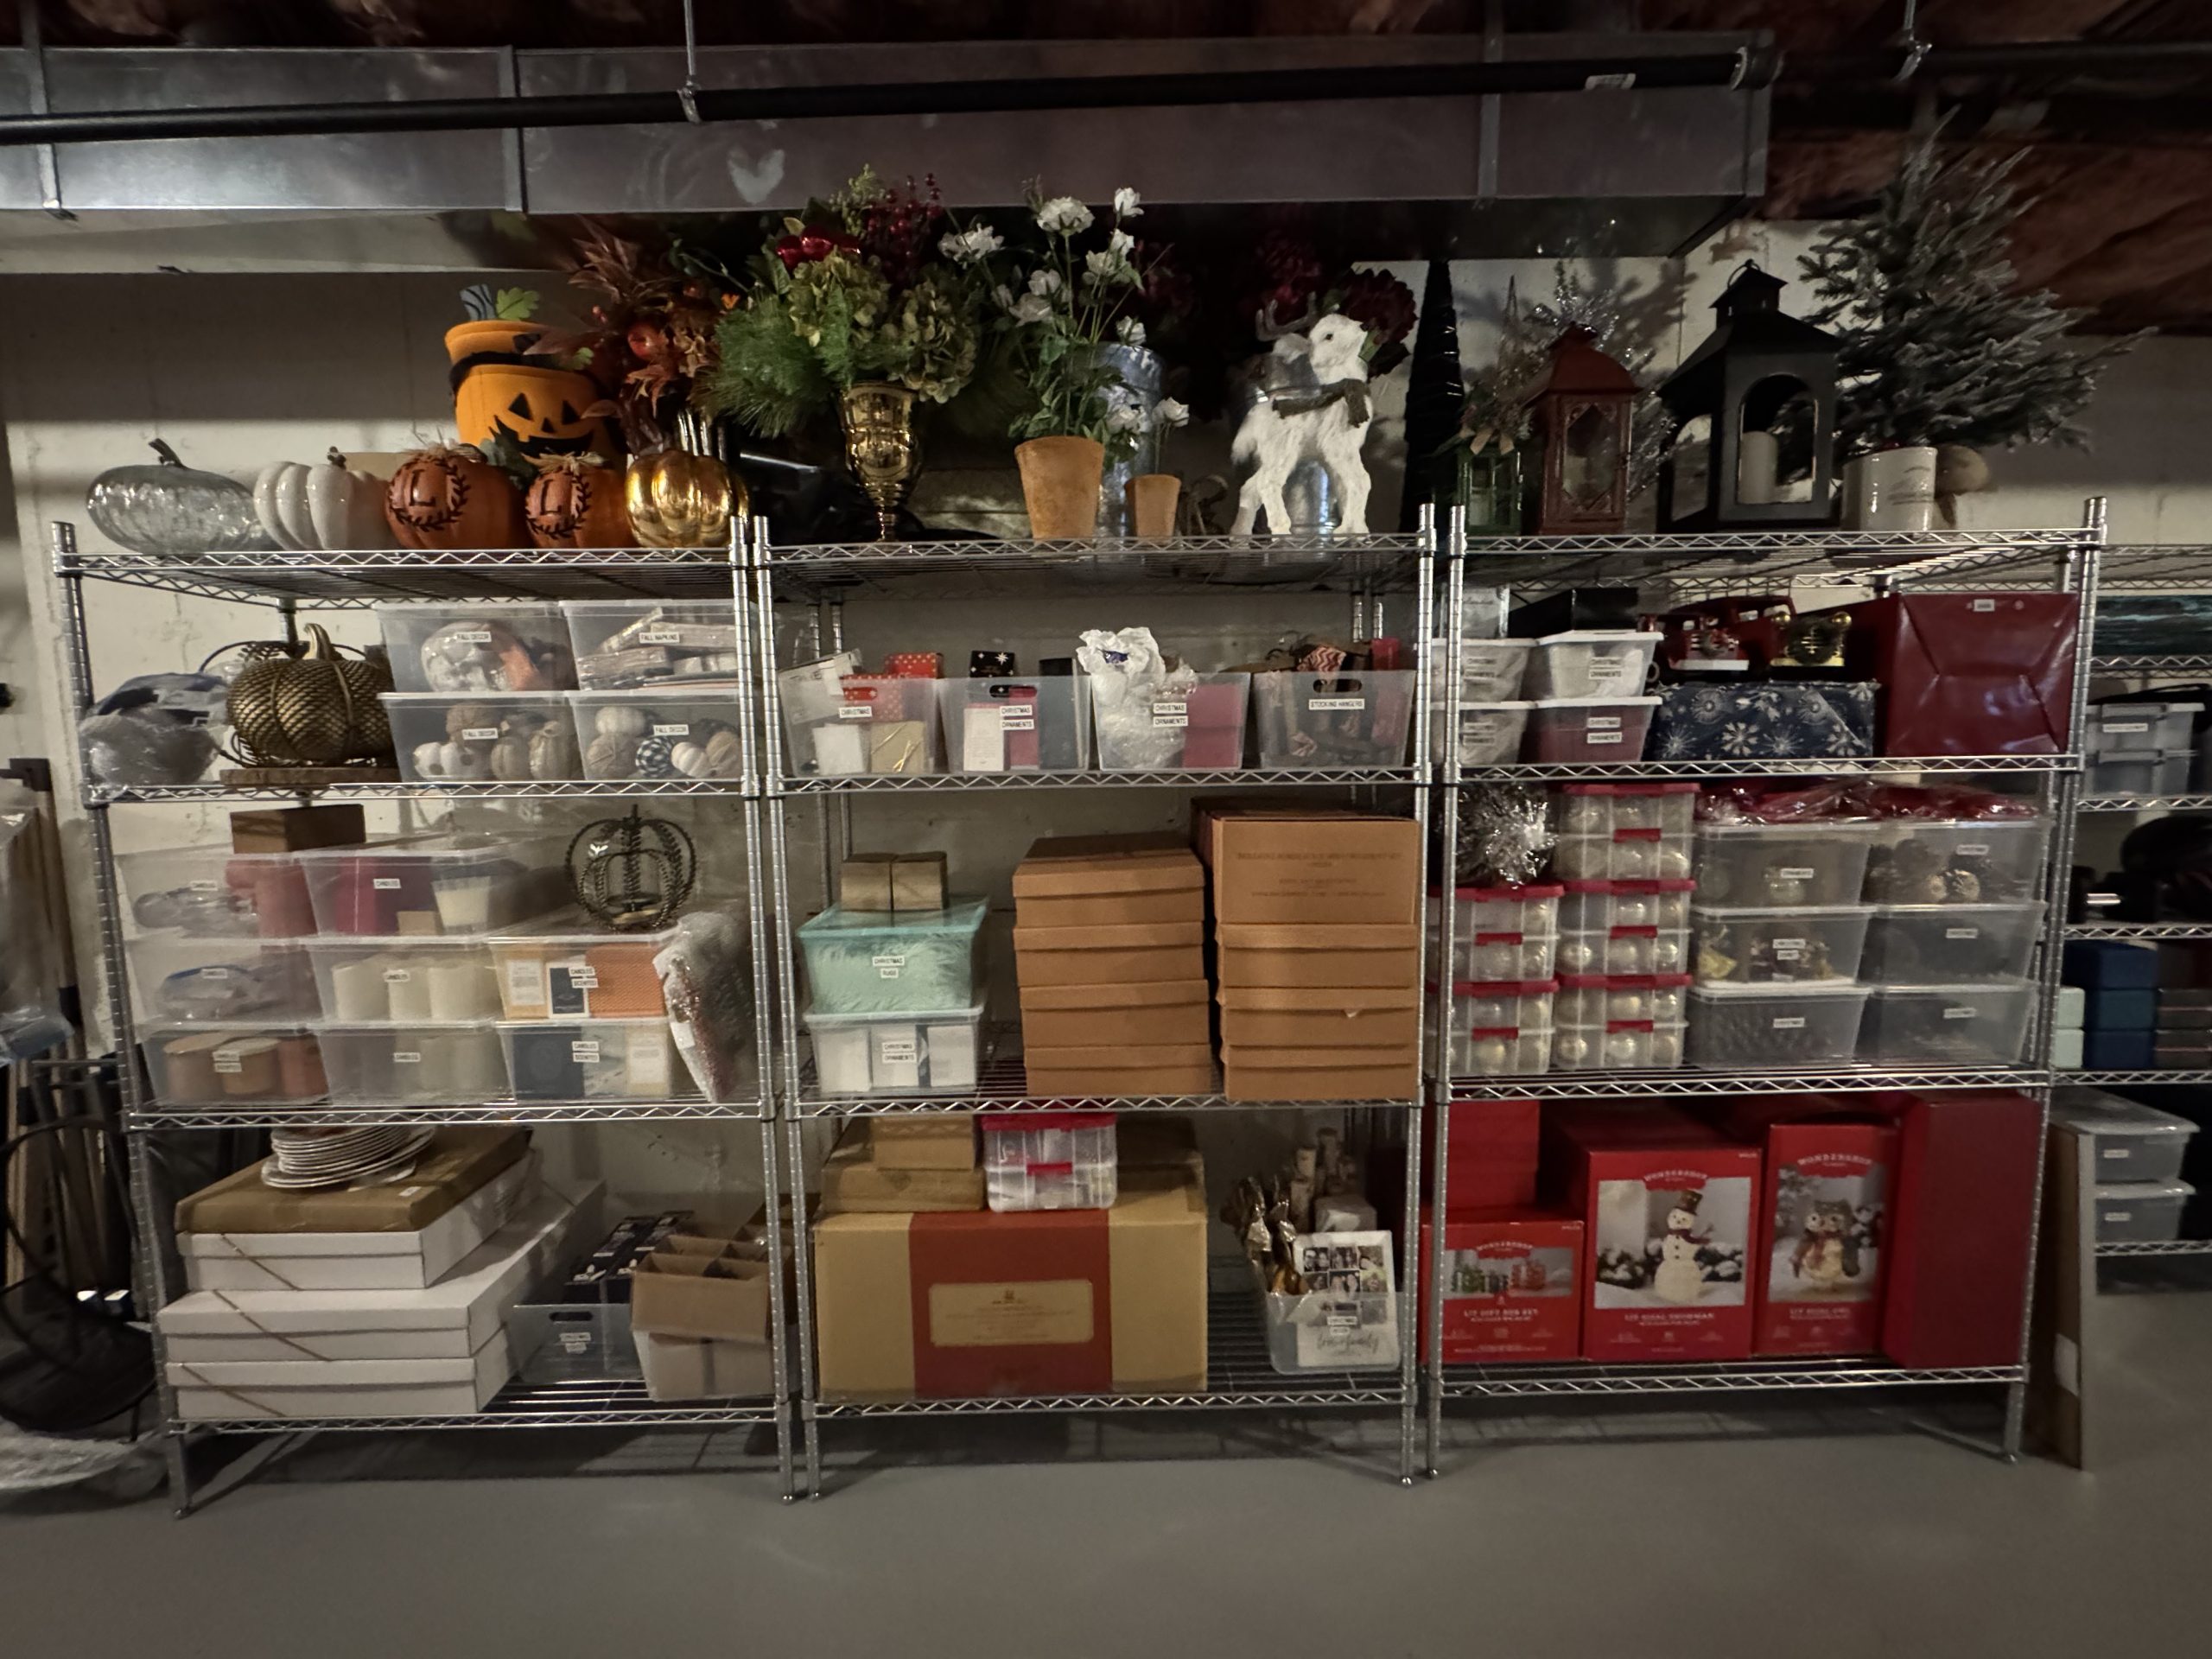
Organizing-to-stay requires things like clear bins with P-Touch labels, to stay organized. Organizing-to-move requires moving boxes, to move. In both cases I recommend the same tools to get organized. The number one tool is the banker box for sorting. The same banker box can be use multiple times for getting organized. They are for small items that just need to be sorted by category, first for review, then for keep. They are lidded, which means they can be stacked. Vertical stacking opens up horizontal space for processing.
Another useful tool for getting organized is the Ziploc Bag. The gallon size is great for sorting paper, before committing to files. The also work great for sorting tangled cords. The quart size are great for sorting small items like loose change and missing parts. Again, they are not intended for permanent organizing solutions. Their benefit comes from offering “bookmarks”, so you don’t lose your place between organizing sessions.
4. Label like crazy
A final pair of processing tools is the Post-It Super Sticky Notes and the Retractable Sharpie. I like the retractable Sharpie because you never lose a cap with it. The Extra-Stickie Post-It is worth the extra cost, because you worry less about your labels falling off. Don’t underestimate the importance of labeling every step of the way. Trust me. You will be amazed with what you forget, when downsizing. Your zones will provide the primary “bookmarks” for your downsizing project. However, there are times when you are dependent on the label. For example, you may come across some items that your husband Joe needs to make a decision on. Those go in box labelled “Joe Review.” Or if you discover a piece to another item you haven’t found yet, where does it go? Create a “missing pieces” box. It happens every time.
When you label every single box, you are clear on exactly what next step is required. If your current plan is to trust all of this to memory, that is a bad plan.
So when downsizing, always start by giving yourself bookmarks for the process. First give yourself a bookmark with the exit zones. Then give yourself a bookmark between the keeps-to-show and the keeps-to-move. Finally, use boxes, Ziploc bags, and labels to keep decisions straight between sessions. If you think you will remember in the moment, hey, that’s only natural. The fact is, you need to be kinder to your future self. Also, more often that not, you need to realize that you are working with others. When working with others, you need to be on the same page. Do yourself a favor. Downsizing is more complex than reading. Don’t trust your memory. Bookmark your place with zone signs and labelled boxes.
Please Share With Your Community


Related Posts


Testimonials
What some of our clients are saying

